Free Halftone Generator Online: Dots, CMYK Screens and a Riso Effect
This halftone generator turns a photograph into the dots of a printed page. Choose a single-ink halftone, a four-colour CMYK separation or a two-ink riso effect, then set the dot size, screen angle, dot shape, inks and paper. The picture is processed on your own device and downloads as a full-size PNG.
Make a halftone print
How to use the halftone generator
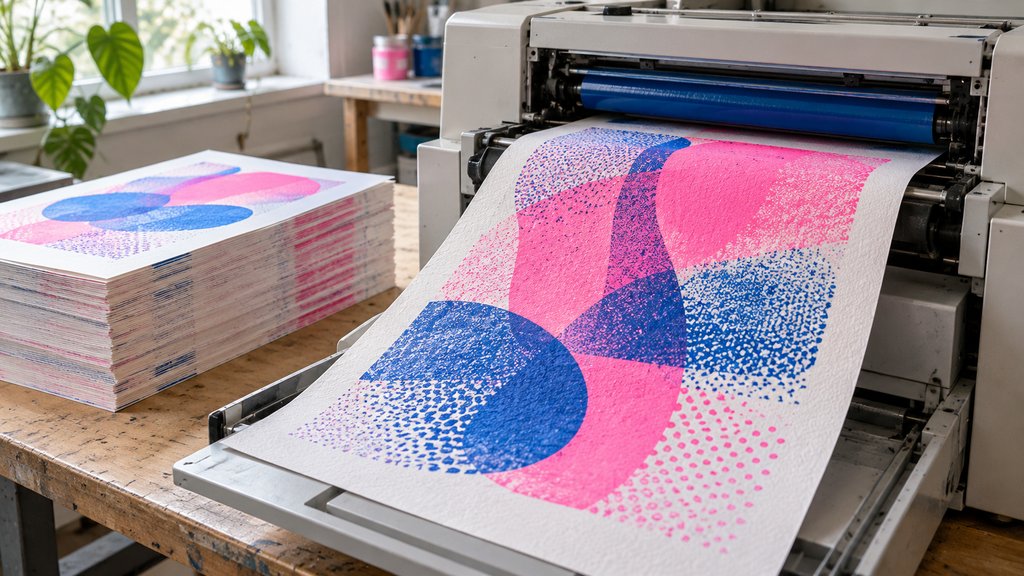
Choose a picture with the button above or drop one onto it. Until then, a sample photograph of a print studio bench shows how each setting behaves. The halftone generator redraws the print every time a control moves, so adjust one setting at a time and watch the result before moving on to the next one.
Start by picking a process. Halftone prints the picture in one ink, riso prints it in two inks with a little grain and misregistration, and CMYK separates it into the four inks used for most colour printing. Then set the dot size, which changes the character of the print more than any other setting on the page.
When the print looks right, download it. The preview is drawn at a moderate size for speed, while the download is printed again at up to 2400 pixels on the long side, so dots stay crisp. The file name follows your picture’s name and the process, which keeps several versions tidy in one folder.
Dots, screens and angles
A halftone screen is a grid of dots laid over the picture at an angle. Each dot grows or shrinks with the darkness of the picture beneath it. The screen angle control turns the grid, and 45 degrees is the classic choice for a single ink, because the eye notices a diagonal pattern less than a horizontal one.
Dot shape changes the texture. Round dots give the familiar newspaper look, square dots feel more graphic and mechanical, and line screens turn shading into parallel bars of varying width, an effect common in older engravings and banknotes. All three follow the same tones, so the choice is purely about texture and mood rather than accuracy.
Contrast and brightness are applied before the dots are drawn. Raising contrast pushes light areas towards bare paper and dark areas towards solid ink, which suits a bold poster. Lowering it keeps more middle tones, useful for portraits and soft landscapes. Small moves make a big difference, because each dot exaggerates the tone it represents.
Making a riso effect in two inks
The riso process prints the picture twice. The first ink carries the shadows and most of the detail, while the second ink picks out the warm parts of the picture, so skin, wood and sunsets come through in the second colour. Both layers overprint, so where they overlap the inks mix into a third, darker shade.
Real stencil printers rarely line the two passes up perfectly, and that small offset is part of the charm. The misregistration control shifts the second ink by a few pixels. Keep it low for a clean print or raise it for the slightly careless look of a zine. Grain adds the fine speckle of uncoated paper and ink.
Ink choices follow the bright colours stencil printers are known for, including fluorescent pink, blue, yellow, teal and violet. Fluorescent pink with blue is the classic pairing for a riso effect, and black with a single bright colour gives a strong, simple result. The colours here are close screen versions, since fluorescent ink cannot appear on a screen exactly.
CMYK colour separation in the free halftone generator
The CMYK process splits a colour picture into cyan, magenta, yellow and black, the four inks of most commercial printing. Each ink gets its own screen at its own angle, 15, 75, 0 and 45 degrees, so the dots form small rosettes rather than clashing into moiré. Zoom into a download to see the rosettes clearly.
The free halftone generator uses a simple separation with full black generation, so dark areas are printed mostly in black ink rather than a heavy mix of the three colours. Professional prepress software tunes this for each paper and press, so treat the result as a convincing look for screens and posters rather than as files for a print shop.
A short history of the halftone
Before halftones, printed pictures had to be drawn or engraved by hand. Photographers and inventors spent decades looking for a way to break continuous tone into printable marks. William Henry Fox Talbot experimented with fabric screens in the 1850s, and by the 1880s newspapers had begun to print real photographs using ruled screens and dots.
Halftone dots shaped the look of twentieth-century advertising, from magazine covers to the enlarged dots of pop art. The Risograph arrived later, in 1980, as an office duplicator from Japan, and was adopted by artists and small publishers for its bright inks and low running costs. The print ads history follows the advertising side of the story.
How the halftone generator works
Everything runs in the browser on a canvas. The halftone generator first shrinks the picture to the size of the dot grid, averaging the pixels under each dot. It then walks a rotated grid and draws one dot per position, its size set by the darkness at that point. Each ink is drawn on its own layer and overprinted.
The limits are deliberate. There is no vector export, so the result is a PNG, and the CMYK separation is a simplified one for visual effect. Very large pictures are scaled down to 2400 pixels on the long side to keep the page responsive. For a matching layout, the vintage ad maker applies the same print textures to type.
Questions about the halftone generator
What is a halftone?
A halftone reproduces a continuous-tone picture, such as a photograph, with dots of a single ink. Large dots close together read as dark areas, and small dots with a lot of paper between them read as light ones. From a normal reading distance the eye blends the dots into smooth shades, which is how most printed photographs work.
Is this halftone generator free?
Yes. The halftone generator is free, needs no account and adds no watermark. You can process as many pictures as you like and use the results in personal or commercial work. Only the rights in the original picture matter: if the photograph belongs to someone else, a halftone version of it still belongs to them.
Are my pictures uploaded?
No. The picture is read by your browser and processed on a canvas element on your own device. No file is sent to a server, and nothing is kept when you close the page. That also means very large photographs take a moment to process, especially on older phones, because all the work happens locally.
What is a riso effect?
A riso effect imitates prints from a Risograph, a stencil duplicator made in Japan that prints one ink colour per pass. Two-colour riso prints show bright inks overlapping, visible grain and colours that sit slightly out of register. Designers and zine makers use the look for posters, books and packaging because it feels handmade.
Why do the CMYK screens use different angles?
When two regular dot screens sit at similar angles, they interfere and create a coarse wavy pattern called moiré. Printers avoid it by turning each ink's screen to its own angle. A common set is 15 degrees for cyan, 75 for magenta, 0 for yellow and 45 for black, the strongest ink placed where it is least noticed.
What dot size should I use?
Small dots keep detail and look like a magazine photograph, while large dots turn a picture into a graphic pattern. For a bold poster or a social image, try a dot size between 12 and 20. For a picture that still needs faces or small objects to read, stay below 10 and raise the contrast slightly.
Can I print the result?
Yes. Downloads measure up to 2400 pixels on the long side, which is enough for a print of about 20 centimetres at a good resolution. For a large poster, use a bigger dot size, because the dots themselves carry the picture. A coarse halftone holds up well when it is enlarged, which is part of its appeal.
Sources
- Ingenium (Canada's museums of science and innovation), Illustrated News: half-tone photographic printing
- Victoria and Albert Museum, Fox Talbot's photoglyphic engraving with a cloth halftone screen
- RISO, Inc., Company history and timeline
- University of Illinois College of Fine and Applied Arts, What's a Risograph? print guide
- Royal Philatelic Society London, Tone and colour: halftone, CMYK and screen angles